Monday, July 30, 2012

Homemade Mini Corndogs


Corndogs.  What is not to love about them.  These are probably one of my children's favorite foods (I'm sure that will change by tomorrow).  They like that they are small enough to pick up with their fingers and can be eaten in about 3 bites.  I like that they aren't asking for peanut butter & jelly sandwiches when I make them.  I also love that they are so easy and inexpensive to make.  All you need is cornbread mix (I usually make my own with the recipe off the back of the cornmeal bag) and a pack of hotdogs.


You could probably use a regular muffin pan, but
I prefer the mini one (since the little people in my life can hold them better).
All you have to do is in a greased muffin pan, put a spoonful of cornbread mix.  Then put a small piece of hotdog into the well.  Then cover the hotdog with more cornbread mix.  Easy peasy.


Then put the muffin tins in the oven, and bake until cooked through.


Then remove from the oven and enjoy!  You can always mix it up a bit to by adding honey or other various ingredients to add a little more flavor to the cornbread.

Mini Corndogs

1 box of Cornbread mix (Or one batch of any recipe cornbread you prefer)
1 pack of hotdogs

Preheat oven to 425 degrees.

Mix the cornbread mix according to the recipe or the instructions. 

With cooking spray, grease two mini muffin tins.  Then spoon about 1 teaspoon of cornbread mixture into each well of the muffin tin.

Insert a small piece of hotdog into each well.  My kids like bigger pieces of hotdog, but it really is up to you how much hotdog you want in each corndog.

Once there is a hotdog in each well, cover all the way with the cornbread mixture.  Then bake in a preheated oven for about 15 minutes, or until corndogs are cooked through. 

Remove from the oven and enjoy!

Menu Plan Monday 07/30 - 08/05

Happy Monday!  I know it has been almost two weeks since I've done a menu plan, but last week sorta just flew by without getting a moment to really buckle down and get it done. 

Last Tuesday was our our six year wedding anniversary.  We celebrated Monday by going out to dinner without the kids.  This is always at treat, since we almost never go out without the kids in tow.  My husband even surprised me with roses.  It was so sweet.


Tuesday, a friend and I worked on making some blueberry jam.  It turned out lip smacking good.  You can check that out here.  Wednesday, my little boy had to go and get a few cavities filled at the doctor's office.  Ick.  That is never fun, but he took it like a champ.  He even fell asleep while they were filling them. 


The rest of the week really flew by with just the regular housework and what not that seems to be never ending.  Unfortunately, since there was no menu plan last week, dinner was such a chore.  With no meal planned, I actually had to figure out what to make once I got home from work.  Unfortunately for my family, this meant a lot of super easy boxy type meals.  We ended up having macaroni and cheese, grilled hot dogs, and other easy peasy type items.  Needless to say, they were not amused.


This week, I'm hoping to pacify them by actually having some good, planned out meals.  So here we go:

Monday
Homemade Corndogs 
Homemade Fries


Tuesday
Leftovers

Wednesday
Pork Chops
Mashed Potatoes
Vegetables

Thursday
Italian Crock pot Chicken
Bread

Friday
Hamburger Pie
Biscuits

Saturday
Pasta
Garlic Bread

Sunday
Chicken Cordon Bleu
Stuffing
Vegetables

I'm also hoping to squeeze in maybe some cookies, or some type of dessert type item this week.  I'm thinking that either cookies or cupcakes have sounded pretty darn good lately.  So what's your family having for dinner?  Need some more ideas?   You can find more great menu planning ideas at I'm an Organizing Junkie's Menu Plan Monday.

Sunday, July 29, 2012

Three Way Cherries


If you haven't been able to tell, I've been in a canning type mood lately.  I think just with all the fresh fruits and vegetables around, it makes me think of everything we miss out on during the cold winter months. 

Yesterday, a friend of mine brought over an absolutely gigantic bag of fresh Bing cherries.  Her husband found a great deal on them, so he picked them up for us to go on some more jamming adventures.  The first thing we decided to do with these beautiful cherries was to whip out a batch of fresh cherry jelly. I am so glad we did! It turned out so good. Much better than any cherry jelly I've had from the store by far. The recipe we used made 6 (8 oz.) jars of cherry jam, with just enough left over to enjoy over ice cream.  This jam is amazing!


After looking to see how many more cherries there were left, I decided we definitely needed to do something with them to keep them fresh.  I hadn't actually tried canning fruit before, just the jam, so the cherries became my experiment fruit for canning.


Following the normal procedures for canning, I first sterilized the jars.  After that, I stuffed the jars full of the pitted cherries, being careful not to fill them too full (You want the fruit completely submerged in the simple syrup).  I actually added a bit of a vanilla bean to each jar too, to add a slight vanilla bean taste to the cherries.  After that, fill the jars with simple syrup, leaving about 1/4" head space at the top of the jar. 

Then the jars were placed in the canner and boiled for about 15 minutes.  Then the jars were pulled and placed on the counter for 24 hours, to ensure the seal set correctly.


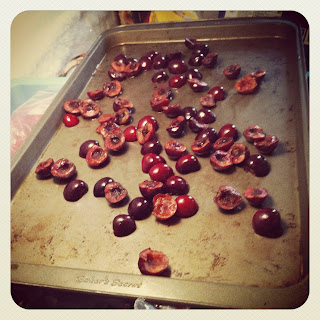
Even after making six jars of jam and six jars of canned cherries, there was a slight surplus of cherries.  With the last bit of cherries, I pitted them, and spread them over a cookie sheet and placed them in the freezer.


Once frozen, these were put into a freezer bag and sealed for later use. 

So there you have it.  Cherries, three different ways, ready for the winter months when cherries are either A) unavailable or B) too expensive to justify the purchase of said cherries.

Cherry Jam

3 cups finely chopped sweet cherries
1/2 cup lemon juice
1 box MCP Pectin
4 1/2 cups sugar
1 teaspoon cinnamon

Measure out sugar into a bowl.  Set aside.

Prepare fruit by pitting and chopping into fine pieces.  Measure out the exact amount needed into a 6 or 8 ounce sauce pot.  Add the lemon, cinnamon, and pectin to the cherries.  Stirring constantly, cook the fruit mixture until it has reached a rolling boil. 

One a rolling boil has been reached, add the sugar and stir until there are not clumps.  Bring mixture back to a rolling boil.  Once it hits a rolling boil again, time it for one minute.

Once the minute has passed, remove mixture from heat and can immediately.


Canned Cherries

2 pounds sweet cherries
4 cups water
1 1/2 cups - 2 cups sugar
vanilla beans

Wash and pit your cherries. 

Combine the water and sugar in a large saucepan.  Stir and bring to a boil to dissolve the sugar.  Keep hot (But not boiling) while you prep your jars.

With clean hands, stuff as many cherries as you can get into each jar.  Fill to about 1/2" from the rim of the jar.  If you want to add vanilla to your cherries, add about a 1 inch piece of whole vanilla bean to the jar a s well.

Fill each jar with the hot syrup, stopping about 1/4" from the rim of the jar.  With a clean, hot, wet cloth, wipe the rims of the jars and place the sealers and lids on top.  Tighten with your hands.

Process in a boiling water bath for 15 minutes.

Remove from the water bath, let cool, and listen for the pops.  To let the full flavor develop, let the jars rest a few weeks before digging in.  Refrigerate any jars that do not seal and enjoy immediately. 


Saturday, July 28, 2012

Something New Saturday: Chicken Pitas


I am a huge fan of food on the go.  Even if I'm not eating on the go, I like a food that uses limited dishes, and I can walk around while eating it. 

The other day while wandering around Yokes, I saw a bag of pita bread.  While I've never actually made anything at home using a pita, I thought to myself, "That pita could be packing some serious deliciousness.  And I could eat it without dishes."  This may sound like a sort of random thought, but I like the idea of being able to not be confined to the limiting constraints of things, like plates and forks.  I want to be free while I eat.  So the idea to make chicken pitas was birthed.

To make these delicious pockets, I basically just cooked some chicken up, threw some seasoning in it.  Then I packed chicken, and other items into the pocket to create a mixture of awesomeness.

My kids, being plain janes, simply had chicken and cheese in their pitas.... boring.

I went a little crazy and mixed black beans, corn, chicken, lettuce, and some cheese.  I even added tapatio and sour cream.  Talk about wild, huh?

Here's the gist of how we made them:

Chicken Pitas

Pitas
Chicken
Assorted Toppings, depending on your tastes (I had cheese, lettuce, corn, black beans, sour cream, and tapatio)
Fajita seasoning

Dice and cook chicken until there is no pink (cooked all the way through).  Then season with fajita seasoning.

Once the chicken is all prepared, heat the pita bread until it is soft and pliable. 

Then stuff to your hearts content with whatever toppings you desire.

Easy Peasy.

What type of toppings do you like to stuff in your pita?

Wednesday, July 25, 2012

Exuding Versatility: The Versatile Blogger Award


Have you ever heard of the Versatile Blogger Award?  Me neither.  Until recently that is.  Today I was checking the updates of the blogs I follow pretty regularly and low and behold, my friend Steve Madden (not the shoe maker) at http://travellerzero.wordpress.com/ had blogged about this award. 

After reading up on the history of it, It sounds like it is an award that is bestowed upon a blog by another blogger, pending of course, the strict adherence to a rigorous set of criteria (Ok, well maybe not rigorous, but they ask you do a few things if you are nominated/awarded it).  It is to honor other bloggers and basically give them warm fuzzies about how great they are and how they're writing affects you, whether they post something every so often, or every day.

Anyways, off of that rabbit trail.  While reading the latest and greatest from the Travellerzero Blog, I noticed that he had listed me as one of his fifteen nominations for the Versatile Blogger Award.  Before I go any further, I wanted to say Thank You to Steve Madden from the Travellerzero Blog.  I only recently started blogging and the while I personally have enjoyed putting some of my thoughts/ideas/recipes into words, I never actually imagined that anyone would enjoy reading them.  So, the fact that I was nominated is really heart warming to know that others enjoy reading what I'm thinking about as much as I enjoy writing it.

One of the rules of being nominated for this award is to list fifteen blogs that you've recently found or regularly follow that are worthy of being nominated for the Versatile Blogger Award due to being either versatile and/or mind blowing.  So here is my "list."

1.  Heavenly Homemakers:  I really don't remember where I originally found this blog, but the author, Laura, is amazing.  She blogs about her family's quest to eat healthy, as well as just the day to day life of being a parent.  She has some great recipes as well as always has enjoyable stories about her family.

2.  Defining Bliss:  This blog is written by one of my closest friends, April.  Originally she started the blog to be a cooking type blog, but it really has bloomed into more of a mish mash of different things such as make-up, cooking, books, and fashion.  She is actually the one who encouraged me to first start a blog and is always such an inspiration to me.

3.  Life's Crazy Joke:  This particular blog is one that I follow religiously.  Meredith is a hoot.  She always has something to say that makes me either laugh, or be able to relate.  She also has great advice in regards to human resource questions.  Amazing blog.

4.  Brittany, HerselfThis is another blog that I follow with stalker like passion.  I always feel like I can relate to what Brittany writes about in regards to parenting, and just other life situations that she faces.  Her kids are even almost the same age as mine, so I can relate just that much more.  When I need a laugh, this is my go to blog.  She originally was named The Barefoot Foodie, but then changed it (pretty recently actually) to Brittany, Herself (sorry for the similar name Brittany, I was lacking on ideas the day I named my own blog).  Brittany truly exudes versatility, always bringing fresh perspective, whether she's talking about her family, or the latest and greatest book she's added to her special book club.

5.  Untypically Jia:  Untypically Jia is a blog that really covers everything.  Jessica talks about her passion for make-up, her family, her struggles with infertility, mental illness, weight loss, her faith, and pretty much anything else she thinks up.  She is not only entertaining, but she is inspirational in her honesty on all the subjects that she talks about.  She doesn't sugar coat things, she says it how she sees it.  Her posts always are a breath of fresh air into the topics she explores.

6.  Travellerzero:  Truthfully, I know that Steve is the one who nominated my blog originally, but I think that he deserves this award as well.  Steve writes about his family, his books that he's written, and any other topics he feels like wandering off onto.  He is very passionate about his books and his writing, and they are good books.  His passion for his books comes out in his writing.  If you haven't read his blog or checked out his books, you should.  The books he's written (Ascension, The Four-Year-Old Guardian, and Shadow Walker among others) are well articulated and the way he writes just draws you into the world of these characters that he's created.

7.  Annie's Eats:  I originally found Annie's blog from another cooking blog that I follow (The Comfort of Cooking).  Annie is absolutely fearless in the kitchen.  She always has fresh ideas for not just desserts, but pretty much anything that can be whipped up in the kitchen.  Her beautifully photographed dishes always make me want to get into the kitchen and do something.  She is creative and has a flair for making things just look as good as the taste.

8.  The Comfort of Cooking  The Comfort of Cooking was probably one of the first blogs I ever really followed.  Georgia is amazing in the kitchen.  Her dishes always look so professional in the pictures she takes for her blog.  She is versatile in the types of foods she makes and always adds her own pizzazz to dishes that is refreshing to see.  This is a food sight that I follow closely for ideas of things to whip up in my own kitchen.

9.  Six Sister's Stuff:  The Six Sister's Stuff blog is a compilation of recipes and other topics that a group of sister's started since they aren't all in one spot.  They mainly have recipes and DIY type stuff on their site.  They have tons of crock pot style recipes.  I've made dozens of things from this site, and all of them are delicious.  I don't think I've gotten a bad recipe from here yet.  This site is the go to site when I'm not sure what to feed my family.

10.  The Oatmeal:  The Oatmeal is quite frankly one of the funniest things I've seen on the internet recently.  The comics are always funny and almost always have references to current pop culture.  Found this blog in a link from another blog I read pretty regularly.  It is hilarious.  Check it out.

11.  I'm an Organizing Junkie:  The name really says it all for this one.  Laura writes about organization for all sorts of topics, ranging from food organization to household organization.  She does a link up party every Monday (Menu Plan Monday) that I link up to pretty regularly.  Her site is a fantastic place to find ideas when looking for ideas of what to make for the week.  She regularly posts delicious recipes and is a great place to find new recipe blogs.

12.  Cozycakes Cottage:  The Cozycakes Cottage is another cooking blog (if you can't tell, I really like to cook).  She has some really delicious recipes and some really cute decorating ideas on her site.  One of the best bread recipes I've made to date I found on this site (English Muffin bread).  Drool worthy.

13.  Bakerella:  Bakerella is the woman with whom the cake pops originated.  She is so creative and full of imagination when it comes to the way she prepares her desserts.  She is an amazing baker.  When I am looking for new ideas on something that needs to be not only tasty, but also look completely professional and amazing, this is the place to go.  She posts some great ideas on decorating, as well as shares her wisdom that she's gained from her own experiences.

14.  100 Days of Real Food:    This is a blog I actually recently just started reading.  The author, Lisa, blogged about taking her family on a journey of going from processed foods to more 'real' foods.  She posts plenty of recipes that utilize less processed items in an effort to create a healthier menu.  I love this site as it has plenty of healthy alternatives to things that my family normally would just buy from the store.

15.  Shauna Glenn:  This is another blog I just recently started reading.  Her reading style reminds me somewhat of Brittany, Herself and Life's Crazy Joke, but not exactly.  She writes about an assortment of things, and while I'm not super familiar with her blog yet, I think it is one I am really going to enjoy.

The other piece that goes along with the whole being nominated thing is that you're supposed to tell the person who nominated you 7 things about yourself, so here it goes.

1.  I work full time as the Administrative Assistant for the Paratransit Department of the local Transit.

2.  I am the mother of three amazing children:  Jaycob, Sydney, and Ashton.  The older two boys are in school now, but Sydney is my stay at home child for now.

3.  I love to cook.  It is a passion of mine.  I enjoy being able to create something greater than the single parts it's made up of. 

4.  Although I have 3 children, I am an absolute clean freak.  I cannot stand for my house to be dirty.  It drives me insane.  If it is dirty, I cannot relax until the mess is cleaned up.  It's like the dirt is taunting me otherwise.

5.  I am a sleep talker.  There has been numerous times my husband thinks I am awake and so will talk to me, and I will have no recollection of the conversation at a later point.  I've also taken the opportunity to vehemently deny purchases in my sleep that I clearly had made.

6.  When I am not spending time with my children or in the kitchen, I love to read.  It really doesn't matter what.  I like to read science fiction, romance, horror, action, etc. etc.  I really don't stick to one genre, I am pretty much all over the board in this department.

7.  I probably will never own a pet of my own.  As a child I had horrible luck with animals.  I managed to kill practically every animal I ever owned.  I ended several goldfish (accidentally let my cat eat them), a hamster (this one is up for debate, may have been natural causes), and a cat (I accidentally shut her tail in the door.  The tail fell off.  She ended up getting an infection and then had to be put down).  We did have a dog when I was little, but he escaped (my older brother adopted him), before I could do any damage to him.

If you want to know more about the Versatile Blogger Award, you can get that information here:

http://versatilebloggeraward.wordpress.com/vba-rules/

Here's the general rules for the award if you are nominated:

-  Thank the person who gave you the award/nomination - That is common courtesy.
-  Include a link to their blog... This again, is common courtesy.
- Select 15 blogs/bloggers that you have recently discovered or follow regularly that are amazing.    
- Then nominate them for the Versatile Blogger Award.
- Tell the person who nominated you 7 things about yourself.
- Let your nominees know


Tuesday, July 24, 2012

"Jam"-ing Out: 3rd Times the Charm


 ♫ ♫ ♫ Oops, I did it again ♫ ♫ ♫

No, I am not singing a Britney Spears song. (Although, as embarrassing as it is to admit, I did belt that song out into my hairbrush back in the day).  I am talking about making jam.  I have really been on a roll lately with this, so when my good friend April brought over fresh blueberries today, we did not hesitate to get going on some more jelly.

Since April's husband Richard picked these juicy little berries off a road side stand, we had to go through and check for stems and leaves.  (Truthfully, we would have gone through them even if they came from the grocery store).  To get this task done, we employed my daughter Sydney.  She was more than happy to oblige.


After going through the berries, we rinsed them off in the sink with a colander.


Then these plump little things did the mash potato (well, not really; they got mashed with a potato masher)


Then, in a large saucepan, the blueberries, lemon juice, pectin, and water were brought to a rolling boil.  We also added about a teaspoon of butter to prevent any foaming incidents.


After the mix was brought to a rolling boil, the sugar was added.  Once the sugar was mixed all the way into the blueberry mash up, it was brought up to a rolling boil again.  Once the mixture hit a rolling boil, the timer was set for one minute.  Once the minute was up, the mixture was taken off the heat.

Then we canned the jam into 8 ounce jars.  The recipe yielded 8 (8 oz.) jars as well as just enough syrup to enjoy a nice scoop of ice cream.


Although I have enjoyed all of the jams we've tested out so far, this recipe is by far my favorite so far.  It has such a good flavor, in my opinion, I almost think it's even better then the store bought blueberry jelly.

Here's the recipe we used in case you'd like to try this one out.  It's actually the recipe from the MCP (pectin) package, but with the addition of the butter and a bit of cinnamon.  So good.

Blueberry Jam

3 3/4 cup crushed blueberries
6 cups sugar
1/4 cup fresh lemon juice
1 cup water
Approx. 1 Tbsp. cinnamon
1 tsp. butter
1 pkg. MCP pectin

Prepare berries.  Crush 1 cup at a time, using a potato masher for best results.  Do not puree, jam is meant to be a little chunky.

In a 6 or 8 quart saucepan, measure in the crushed blueberries, lemon juice, water, cinnamon, butter, and pectin.  Bring this mixture to a full rolling boil on high heat, stirring constantly.

Stir in sugar quickly (it's best to have the sugar measured out in a separate bowl before starting to cook the fruit), then return mixture to a full rolling boil and boil for 1 minute exactly.  Remove from heat.  Skim off any foam with a metal spoon.

Ladle jelly into prepared (sanitized) jars to within 1/4 inch of the top.  Wipe the rim of the jar with a damp towel land place sanitized lid on top,  Screw the band tightly on, then place in canner.  Water in canner should cover the top of the lid by approx. one to two inches.  Bring water to a gentle boil and process jars for 10 minutes.

Remove jars from water canner and set in a place where they will be undisturbed for 24 hours.  Once the jars are cooled, check the seals by pressing the middle of the lid with your finger (If the lid springs back, the jar did not seal correctly and needs to be refrigerated). 

Let stand at room temperature for 24 hours.  Store unopened jams in a cool, dry, dark place for up to a year.  Refrigerated jam can be stored for about a month.

Sunday, July 22, 2012

"Jam"-ing Out Part Deux

So the other day, I had my first canning experience, and I decided that I should not delay the second.  Yesterday I had my first attempt at canning, by myself.  While I had confidence that I remembered all the steps I had been shown the previous day, I still was a bit nervous about the whole process.  But I figure, practice makes perfect.

The recipe I chose to make this time around was for Strawberry Honey Jam. 

There was really not a whole lot to the recipe.  The first step was to cut up all of the fruit.  The recipe called for 6 pounds of strawberries


and 1 1/2 apples grated.


Once those were all prepped, throw the fruit as well as the honey and lemon in to a large pot on the stove for about an hour.  Once the berries start getting soft, mush them with something such as a potato masher. 

After the mixture is the consistency you would like, either can it, or prep it for the freezer, or refrigerate it for 4-6 weeks.

There were a few things that I learned from making this recipe.  First off, adding about a teaspoon of butter to the mixture when you first start to cook it is a must.  I cannot imagine how much it would have foamed while it was cooking if I had not added it.  Second, mixing is a good thing.  I left the kitchen for about twenty minutes while cooking it, and I came back to a little bit of jam burnt to the bottom of the pan.  Luckily, I was able to salvage 4 pints of jam, but sadly, 2 were lost due to my inability to focus on one thing at once.

Other than that, I think the recipe turned out great.  The kids all said it tastes just like the strawberry jam we buy from the store, while on the plus side, I know exactly what's in it (and I can say/spell all the ingredients without a dictionary).


Here's the recipe for the jam I made Saturday as well as the recipe for the apricot pineapple jam from Friday:

Strawberry Honey Jam
from 100 Days of Real Food Blog

  • 6 pounds strawberries and/or blueberries, local/organic recommended
  • 3 ¾ cup honey
  • 1 ½ unpeeled apples, grated
  • 1 ½ tablespoons lemon juice

    1. Make Jam: Rinse the berries and remove any spoiled or severely blemished ones. Hull strawberries and slice in half.
    2. Add the berries, honey, grated apple, and lemon juice to a large pot over high heat. Once the mixture comes to a boil, lower the heat to medium and allow the mixture to continue to boil lightly for approximately 30 – 60 minutes. The berries will burst and thicken so be sure to scrape the sides of the pot and stir as you go. The longer the jam cooks the thicker the final product will be.
    3. Mash the fruit with a potato masher once the fruit begins to soften. If foam forms on top of the fruit you can skim and discard if desired.
    4. Prepare Jars: Meanwhile fill the canning pot ¾ full with water, cover, and bring to a boil over high heat. If you don’t have your jars sterilizing in a hot dishwasher you can use this pot of water to sterilize them. Also start a small pot of boiling water to sterilize the lids separately. Be sure to wash all jar pieces in hot soapy water first.
    5. Once the water is boiling turn off the heat. Test the temperature with your thermometer and when it reaches 180 degrees F put the jars and bands in the large pot and the lids in the small pot. Leave everything in the hot water until ready for use, removing one at a time as needed.
    6. When the jam is done cooking do a taste test to make sure the thickness and flavor is to your liking. Hint from Ashley: Drop dots of jam on a cold refrigerated plate, if it seems to set up, it is done. You can also see if it coats the back of a spoon.
    7. Remove the first jar from the hot water using your jar lifter tool and shake out excess water. Don’t touch inside of the jar in order to keep it sterilized. Insert clean canning funnel and ladle the jam into the jar leaving ¼ inch headspace at the top (this is where the headspace tool can come in handy – leaving more space at the top might not give as good of a seal). If there are any air bubbles you can slide a clean knife along the inside of the jar to remove them. Using a clean rag wipe excess off the outside of the jar and rim.
    8. Using a magnetic lid lifter pull the first lid out of the hot water and set on top of the jar without touching the bottom of it. Then while only touching the outside of the band screw it onto the jar just firmly enough so it doesn’t feel wobbly on the grooves. Repeat until all jars are filled.
    9. Note (If you don’t want to actually “can” the jam): You could stop here and refrigerate jam for 3 – 4 weeks. To freeze the jam make sure you used freezer-safe jars, allow it to cool, and put in freezer for up to one year.
    10. Process the Jars: Bring large pot of water back to a boil. Using your jar lifter (or canning rack) carefully lower as many jars that will fit without overcrowding into the boiling water so they are covered by at least 1 – 2 inches of water. It is recommended that the jars do not directly touch the bottom of the pot (so hot water can flow beneath them) and some even suggest putting a dish towel on the bottom to create space. From the moment the water is boiling and the entire first batch of jars are submerged set the timer and process them for 10 minutes.
    11. When 10 minutes is over use the jar lifter to carefully remove the jars from the water. Put them on the counter and don’t move them right away. You will hear your jar lids “popping” which means they have been sealed properly. If jars aren’t sealed within 12 hours then move them to the fridge and eat within 3 – 4 weeks.
    12. Remove bands from sealed jars and with a clean, wet cloth wipe off any jam that has congealed on the outside rim of the jar. This prevents mold from forming on the band. The band can be reapplied, but don’t screw them on too tightly.
    13. Label jar and store in a cool, dry, dark place for up to 1 year.

    Apricot Pineapple Jam
    (From the MCP insert)

    4 cups apricots, diced into chunks
    1 cup pineapple, diced into chunks
    1/2 cup lemon juice
    1 package pectin (I used MCP brand)
    8 cups sugar

    Put apricots, pineapple, lemon juice, and pectin into a large pot on the stove.  Heat to a rolling boil.  Once the mixture is at a rolling boil, add sugar.  Mix unitl there are no chunks of sugar, then bring back to a rolling boil.  Once there, cook for 2 minutes.

    After cooking the mixture for 2 minutes, fill your jars and process for canning.

    Friday, July 20, 2012

    "Jam"-ing Out

    I have always wanted to make homemade jam or jelly.  I think the whole idea of being able to make your own jelly and can your own fruits is such a neat thing to do.  Very domestic. 

    My bestie April, and her mother in law came over today to teach me just that (Thanks again April for sharing your mother in law with me today), to make homemade jam.   April and her mother in law brought over apricots and plums and we got busy 'jamming' out.

    I was truly surprised at how easy it really was to make and can jam.  The only ingredients we used were sugar, pectin, lemon juice and fruit.


    The first step was to sanitize the jars.  We did this by putting the jars in boiling water.  This santized them and prepped them for the jam.  While the jars were being sanitized, April and I chopped up the apricots and pineapple (the plums were already done).

    The next step was to cook the fruit.  The apricots, pineapple, pectin, and lemon juice all got put into a large pot.  The plums were cooked with pectin in a separate pot.


    This cooked until it came to a rolling boil. Then the sugar was added.


    After the sugar was added, the fruit mixture was brought to a rolling boil.  Then the mixture was ready to be poured into the sanitized jars.


    The jam should be filled up to about 1/4 inch from the top of the jar.  Then the rim of the jar needs to be wiped down (otherwise the jar won't seal right).  Then put the lid and seal on.  This then needs to be put into the large pot of boiling water that was used to sanitize the jars (if you have hard water, then new water should be used to avoid hard water stains on the jars).


    Once the water has bubbles starting to come up from the bottom, set a time for ten minutes.  Once the ten minutes is up, the jars are ready to be removed.  Remove the jars, being careful to not tip them sideways (this can break the seal),   Put the jars in a place where they won't be disturbed for about 24 hours.  This will allow the seal to set up correctly so that the jam is botulism free.

    Then feel free to enjoy the fresh homemade jam however you want.  We started off by drizzling the warm jam over vanilla bean.  So delicious!


    I think I'm going to be on a canning kick here soon.   I've already googled about a dozen different recipes I can make (different types of jam, canning fruits, etc.).   I just cannot wait to get started on them!

    So what about you?  Have you ever tried canning, or making your own homemade jelly?  What recipe's have you tried in regards to canning your own foods?


    Wednesday, July 18, 2012

    July 2012 Birchbox


    Yesterday, I finally received my July Birchbox.  It felt like it took forever this month for it to arrive, but I suppose I never have been one for much patience.

    This month's 'theme' was the five senses (sight, sound, taste, touch, and smell.  It arrived in the signature Birchbox with everything wrapped in pretty tissue paper.  ( I ♥ getting these in the mail, it's like Christmas in July!)


    The first item in this months box was a bright blue and pink set of earbuds.  I tested them out on my Iphone, and they work perfect.  I'm not sure how great they will stay in my ears on the go (my ears are slightly elephant sized and I have yet to have earbuds that stay in while I move ☺), but they are really cute, and will work great for jamming out while I'm working on paper work and what not either at home or at work.  This was of course the item that represents the sense of sound.


    For the sense of taste, there was an Uber Larabar.  I was pretty excited about this, since I am in love withthe original Larabars.  The cherry pie flavored on is so good, and they are not too bad for you health wise.  I was actually a little disappointed when I tried it though.  The flavor was not very robust, and it just didn't match up to the original Larabar standards.  It was  still neat to test it out though, especially since now I won't buy a whole box of them and be disappointed with them.


    For the sense of smell, there was a sample of Oscar De La Renta's Live in Love perfume.  The perfume is supposed to have hints of jasmine sambac, rose, ginger, orchid and amber to create a scent that is a mash up of modern and classy.  I love getting new scents, so this was a great sample.  It isn't a perfume I would actually purchase the full size of (there is a lot of amber overtones), but it is pleasant enough that I will wear it occasionally.


    The next item I pulled out of the box was Alterna Bamboo UV+ Color Protection Fade-Proff Fluide.  Personally, I've never tried this product, but I have heard great things about it.  It is a finishing spray that is supposed to protect color treated hair as well as strengthen and give a glossy shine to both treated and non-treated hair.  This item, as well as the next two I'm really not sure which sense they are supposed to match up to.


    After the hair protectant, the next in line item in this month's box was a Stila mini-sized lip gloss in the color Action.  Stila always has great lip glosses, and I'm sure this one is no exception.  It is a pretty berry color with a slightly golden sheen to it.  The applicator is a click type pen with a brush on the end.  So excited about this sample.  I have a bit of a lip gloss collection starting up, so this will fit in nicely.


    Last, but certainly not least, was a small Jouer Luminizing Moisturizing Tint with SPF 20.  This is another product I personally haven't tried yet, but have heard great things about.  It came in the color Pearl, which will be great since I have such a light complexion.  It also has SPF 20 which is so important in a moisturizer (don't want any sunburns here!). 

    This month's Birchbox is valued at about $12, not including the earbuds.  I couldn't really factor those in since they don't have a price on the website for them.  I've seen similar earbuds go for as little as $7 up to $20.  If I had to guess, I'd say the total value of the Birchbox is about $20 if you counted the earbuds, so not bad for only a $10 subscription fee.  I am really happy with the quality of the box this month. 

    If you subscribe to Birchbox, or another make-up sample service, what did you get in this months box?

    If you don't subscribe to a make-up subscription service and want to check Birchbox out, you can visit them at www.birchbox.com.

    Tuesday, July 17, 2012

    I'm Mary Poppins

    Last weekend, my two youngest children (Sydney and Ashton) insisted that we rent Mary Poppins.  So Friday evening, we settled down to watch it.  When I mean settle down, I mean Sydney was running up and down the hallways, Ashton was wandering aimlessly from room to room, all the while the movie was on the television with no one in front of it.  Needless to say, I was surprised at the things I heard when I walked in my house this evening:

    Sydney, at the top of her lungs, was doing a mirror-breaking rendition of this:


    Jaycob (my oldest) then recounted the following conversation he had with Ashton while playing with their army men:

    Jaycob:  Hey, your guys can't fly.  They're not even on the buildings.

    Ashton:  Yes he can.  (In his pretend army man voice) "I'm Mary Poppins"

    Ashton then had the army man float from one building to another as though he was carrying an umbrella and carpet bag.


    This just disproves my theory that they really weren't paying attention to the movie.  As well as enforces the idea that with a carpet bag and an umbrella, pretty much anyone can fly.

    Monday, July 16, 2012

    Menu Plan Monday 07/16 - 07/22


    Hello!  Happy Monday!  It is already the beginning of a new week, as well as it is already mid-July!  Eeek!  It certainly feels like time has been slipping away from me recently, I just cannot believe that it is already half way thru 2012.

    This past week, I had a fairly interesting shopping experience at Walmart, I baked muffins, tried out new recipes, worked,  and I took my kids to a birthday party. 


    Photo taken by Meghan Rickard

    Photo taken by Meghan Rickard

    Photo taken by Meghan Rickard

    The kids had such a great time at the birthday party!  It was hosted by my friend Meghan from Meghan Rickard Photography and Adored by Meghan.  If you haven't seen her work before, check it out.  She is a great photographer!  She does amazing newborn photos and has a real knack for working with children.

    Anyways, here's my families menu plan for the week:

    Monday
    Nachos

    Tuesday
    Leftovers

    Wednesday
    Chicken Pitas**

    Thursday
    Meatballs
    Rice
    Veggies

    Friday
    Spaghetti
    Garlic Bread

    Saturday
    Slow Cooker Sweet Teriyaki Chicken**
    Rice
    Veggies

    Sunday
    Chicken Cordon Bleu
    Potatoes
    Veggies

    This will be week three of my self imposed cooking challenge:  Something New Saturday.  Last week we tried the Grilled Honey Mustard Chicken, which got some pretty mixed reviews.  I also tried out some new Cherry and Apricot Muffins.  Those were addictive.  I ate 4 before I even managed to get them put away.  This week, we'll be testing out a Slow Cooker Sweet Teriyaki Chicken from the Six Sister's Stuff Blog as well as I'm going to be experimenting a bit with creating a Chicken Pita dish of some sort.

    As always, I have linked this up with Laura's Menu Plan Monday over at www.orgjunkie.com

    So what's cooking in your kitchen this week?

    Saturday, July 14, 2012

    Something New Saturday: Cherry and Apricot Muffins


    This week, I originally planned on testing out the Six Sister's Stuff Grilled Honey Mustard Chicken, and I did:  you can check it out here.  But I realized this afternoon that I had a bunch of cherries and a few apricots that were getting pretty ripe in the fridge.  I decided to make muffins with them. 

    First, I pitted all of the cherries and apricots that were called for in the recipe.  This took sort of awhile since I don't have a cherry pitter, as well as my fingers were stained pretty pink for a few hand washings too.

    Once all of the fruit was pitted, I chopped it up into small chunks.  I also chopped up some pecans and set them and the fruit on the side in a bowl.


    Next, I mixed together all of the dry ingredients.  Then I added all of the wet ingredients.


    Stir these together only enough to dampen the flour (batter should not be smooth).  Then add the chopped fruit and nuts. 


    Then I spooned the batter into lined muffin pans.  Bake for about 20 - 25 minutes in a 375 degree oven.


    Let the muffins cool completely before attempting to take them out of the wrapper - otherwise they tend to stick a bit to the paper.  Then enjoy!


    My thoughts on these little delicacies?  Melt in your mouth good.  They were super fruity, which is a trait I look for in a muffin, as well as they were still uber moist.  The breading was not too sweet, so it didn't taste so much like a dessert as some muffin recipes I've tried in the past.  The recipe made 24 muffins total.  I kept 8 out for breakfast the next few days, I packaged and froze 12 of the muffins.  I'm almost ashamed to admit, that the other 4 disappeared before I could do anything else with them (excuse me, as I wipe muffin crumbs off my keyboard ☺).  Most definitely a great way to start of the day, or keep it going mid-afternoon, or to end it!

    Cherry and Apricot Muffins
    adapeted from Cucina Nicolina Blog

    2 cups flour
    3 tsp. baking powder
    1/2 tsp. salt
    1/2 cup sugar
    1/2 tsp. cinnamon
    1 egg, slightly beaten
    1/4 cup vegetable oil
    1 cup milk
    1 tsp. vanilla
    1 1/4 cups cherries, pitted and chopped
    1 cup apricots, pitted and chopped
    1/2 cup chopped pecans

    Preheat oven to 375 degrees.  Grease or line muffin pan.

    Mix the flour, baking powder, salt, cinnamon, and sugar in a large bowl.  Add the egg, milk, vanilla, and oil, stirring only enough to dampen the flour (batter should not be smooth).  Add the chopped cherries, apricots, and pecans and mix lightly.  Spoon batter into the muffin pan, filling each cup about two-thirds full.

    Bake for about 20 - 25 minutes or until lightly browned.