
Well my friends, today is that day.
Recently, my husband and I ordered a bedroom set for my four year old daughter's room. We decided the fact that she's an amazon woman for her age (she would be in the 97% percentile, if she were five. Again, she is only 4), necessitated an actual bed, instead of a the one she had which really is only suitable for one of Snow White's seven dwarfs.

Due to the fact that we no longer will have the same amount of space to store her toys underneath her bed as we did before, I decided we needed to come up with a storage solution for the cascading mountains of stuffed animals that are currently so unceremoniously shoved underneath her bed.
Browsing Pinterest, I decided I finally was going to use one of the many items I'd pinned for a 'future' project. So began the epic adventure of Sydney's Zoo.
For those of you who don't really know me, I am absolutely mechanically impaired and klutzy. I have little patience for things that don't work right the first time. This important fact about myself combined with the fact that we only own a screwdriver, a measuring tape, and a hammer really should have been a big warning sign to myself that maybe it wasn't a great idea to build something that didn't come out of a box and have instructions with it.
The first thing I did was of course go to Home Depot. This was the logical spot to pick up wood, nails, latex tubing and pretty much everything else I assumed I would need for this haphazard experiment.
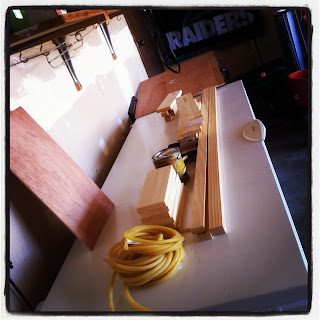
First things first, I decided that I needed to build the basic shape of the "zoo" before I worried about building any height into the thing.
I screwed two of the 20" pieces of wood to two of the 10" pieces of wood. I used the 1 1/2" nails to hold them together, pre-drilling the holes for them so the wood didn't splinter or split.
 From there, I added the 60" pieces of wood to add some height to the thing. This was a little bit of a challenge. Trying to hold the wood in place while drilling holes that were deep enough, but not so deep it went all the way through the boards was certainly a challenge. Luckily I had a little help from my son. He was pretty excited to be such a "big helper." Especially since for the most part, I banned him and his sister from the garage while I was working on this endeavor. From there, I continued on to make another of the square shaped frames and attached them to the stilted legs sticking up from the original rectangle shaped frame. I attached them about mid way up from the first one, at probably about 28" on the 60" legs. At this point, it actually started resembling something that may work out. I was really beginning to think that this would end up an Epic Pinterest Win.
Plugging along from this point, I added the last few pieces of wood to the top to finish off the frame of the new zoo for animals. The next step in the process was adding a stain to finish the wood.

I chose to use a stain/polyurethane combo. This saved a few steps, as I only needed to use one product instead of two. I picked a black satin stain, since the furniture going into the room would also be a black satin color. I added a coat of the stain to the frame and to the plywood board and then had to call it quits for the night so that it could dry.

The next day, I sanded down the wood so that all of the edges were smooth. After sanding all of the surfaces, adding another coat of stain to the wood was the next step. Again, I had to call it quits after this since the stain had to be completely dry before I could do anything else to it.
The next day, I added the words Sydney's Zoo to the top of the frame. I really debated about whether it should say Sydney's Zoo or The Zoo; in the end it seemed more personal to put Sydney's Zoo. It was painted on in a purple acrylic paint, and then glitter paint was added to accent the lettering. After this was dry, a clear coat of polyurethane was added to ensure that the lettering would stay put, even after the inevitable abuse they would see once the piece is placed in it's future home.


Screwing the plywood board to the bottom of the zoo was the last step to complete this project.

Testing out to see if this "zoo" would actually function was something I really looked forward to. I have never actually built something from nothing before, only pre-done kits before, so I was excited to see if it stood up to the task it was made for.


Sydney loves her new animal cage and she already has them on lock down with occasional yard time.
What have you created from Pinterest lately? Are you a pinner or a doer?


omg awesome idea!!! i love it! it would make ME wanna put my toys away too, lol
ReplyDeleteI LOVE this! What would you estimate was the cost? I want to try but on a budget...
ReplyDelete