Showing posts with label Something New Saturday. Show all posts

Saturday, August 4, 2012

Something New Saturday: Homemade Poptarts


I don't know about your family, but I know in mine, one of my kids favorite snacks/treats/morning on the go breakfast is Poptarts.  Those delicious little pastries frosted with sugar and filled with high fructose corn syrup and who knows what else.  When we have these in our pantry, they disappear like they are going out of style.  Due to this predicament, and the fact that they are completely not healthy for you at all, I decided to test out a new recipe I found for Homemade Poptarts.

This recipe actually only had a few ingredients and was actually really simple.  It used whole wheat flour, butter, sea salt, yogurt (I used Greek yogurt since it has more protein in it than regular), and jelly (Great way to use some of the homemade jelly that has been whipped up in my kitchen lately).

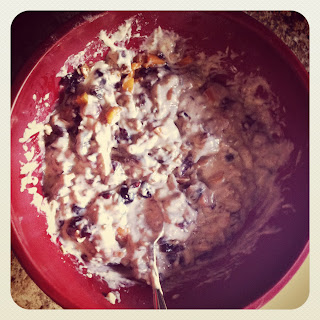
The first step was to mix up the dough for the poptarts.  Measuring out the flour, salt, yogurt, and melted butter, dump them all in a bowl and mix until everything is all good and mixed.  Then, knead the dough a few times to show it who's boss (and to make it workable).


 After the dough is ready to be worked with (it's been kneaded into submission), roll the dough out onto a well floured surface. 


The dough should be rolled pretty thin.  The original recipe I used said that they made about 15-20 poptarts, but I only got 8 out of the batch so I may have rolled mine too thick.  I'd say it was about 1/4" thick, so maybe try slightly thinner if you want to get more poptarts per batch.  After the dough is all rolled out, cut into a rectangular shape.  Try to keep them roughly the same size.  This will facilitate the sealing process once the filling has been put into the pastries.


Next, put the jelly of your choice onto half of the cut out rectangles.  I used blueberry and cherry jelly on the ones I made, but it really is up to you.  I think cinnamon and sugar would be pretty tasty as well.   Once half of the rectangles are jammed up, put an unjammed rectangle on top of it and seal the edges shut.  Then place the sealed pastries onto a cookie sheet and bake in the oven for about 25 minutes or until they are golden brown.


Then remove from the oven.  Once they are out of the oven, you can enjoy immediately, or they can be frozen for later use too.  They toast up great in the toaster.

Now onto the reviews:

Ashton said that these poptarts are pretty tasty.  He said that the blueberry ones were very good and that he thinks that they should be packed into his school lunches once he goes back to school.

Sydney straight up refused to eat them.  She said that they looked gross.  I think the lack of shiny wrappers sort of was a turn off for her.

Personally, I thought that they tasted good.  They weren't exactly like a poptart, but a decent substitute.  While I can see myself making these occasionally, they were a little labor intensive for only 8 poptarts.  I may stick to buying them for now.  Or perhaps I'll try another recipe to see if it yields better results (appeal wise with Sydney as well as quantity wise for myself).

Have you ever tried making homemade poptarts?  If so, how did they turn out? 

Here's the recipe I tried, in case you want to give it a whirl ☺

Homemade Healthy Poptarts
from Heavenly Homemakers Blog

3 1/2 cups whole wheat flour
1 teaspoon sea salt
1 cup melted butter
1 cup plain yogurt
About 5 ounces fruit jelly or jam

Begin by mixing the flour, salt, butter, and yogurt.

Knead the dough just a little bit to make it nice and workable.  Roll out the dough on a large, well floured surface.  Use a knife to cut the dough into the desired poptart size you would like.

Place about 1/2 tsp. of jelly on half of the dough rectangles.  Spread the jelly around, leaving the edges free.  Find a second rectangle that closely matches with each jellied one.  Place it on top and use a fork to seal the edges.

Lay each poptart in a single layer on a baking sheet.  Bake in a 350 degree oven for about 25 minutes or until the crust is lightly browned.

Then remove from oven and enjoy.


Saturday, July 28, 2012

Something New Saturday: Chicken Pitas


I am a huge fan of food on the go.  Even if I'm not eating on the go, I like a food that uses limited dishes, and I can walk around while eating it. 

The other day while wandering around Yokes, I saw a bag of pita bread.  While I've never actually made anything at home using a pita, I thought to myself, "That pita could be packing some serious deliciousness.  And I could eat it without dishes."  This may sound like a sort of random thought, but I like the idea of being able to not be confined to the limiting constraints of things, like plates and forks.  I want to be free while I eat.  So the idea to make chicken pitas was birthed.

To make these delicious pockets, I basically just cooked some chicken up, threw some seasoning in it.  Then I packed chicken, and other items into the pocket to create a mixture of awesomeness.

My kids, being plain janes, simply had chicken and cheese in their pitas.... boring.

I went a little crazy and mixed black beans, corn, chicken, lettuce, and some cheese.  I even added tapatio and sour cream.  Talk about wild, huh?

Here's the gist of how we made them:

Chicken Pitas

Pitas
Chicken
Assorted Toppings, depending on your tastes (I had cheese, lettuce, corn, black beans, sour cream, and tapatio)
Fajita seasoning

Dice and cook chicken until there is no pink (cooked all the way through).  Then season with fajita seasoning.

Once the chicken is all prepared, heat the pita bread until it is soft and pliable. 

Then stuff to your hearts content with whatever toppings you desire.

Easy Peasy.

What type of toppings do you like to stuff in your pita?

Saturday, July 14, 2012

Something New Saturday: Cherry and Apricot Muffins


This week, I originally planned on testing out the Six Sister's Stuff Grilled Honey Mustard Chicken, and I did:  you can check it out here.  But I realized this afternoon that I had a bunch of cherries and a few apricots that were getting pretty ripe in the fridge.  I decided to make muffins with them. 

First, I pitted all of the cherries and apricots that were called for in the recipe.  This took sort of awhile since I don't have a cherry pitter, as well as my fingers were stained pretty pink for a few hand washings too.

Once all of the fruit was pitted, I chopped it up into small chunks.  I also chopped up some pecans and set them and the fruit on the side in a bowl.


Next, I mixed together all of the dry ingredients.  Then I added all of the wet ingredients.


Stir these together only enough to dampen the flour (batter should not be smooth).  Then add the chopped fruit and nuts. 


Then I spooned the batter into lined muffin pans.  Bake for about 20 - 25 minutes in a 375 degree oven.


Let the muffins cool completely before attempting to take them out of the wrapper - otherwise they tend to stick a bit to the paper.  Then enjoy!


My thoughts on these little delicacies?  Melt in your mouth good.  They were super fruity, which is a trait I look for in a muffin, as well as they were still uber moist.  The breading was not too sweet, so it didn't taste so much like a dessert as some muffin recipes I've tried in the past.  The recipe made 24 muffins total.  I kept 8 out for breakfast the next few days, I packaged and froze 12 of the muffins.  I'm almost ashamed to admit, that the other 4 disappeared before I could do anything else with them (excuse me, as I wipe muffin crumbs off my keyboard ☺).  Most definitely a great way to start of the day, or keep it going mid-afternoon, or to end it!

Cherry and Apricot Muffins
adapeted from Cucina Nicolina Blog

2 cups flour
3 tsp. baking powder
1/2 tsp. salt
1/2 cup sugar
1/2 tsp. cinnamon
1 egg, slightly beaten
1/4 cup vegetable oil
1 cup milk
1 tsp. vanilla
1 1/4 cups cherries, pitted and chopped
1 cup apricots, pitted and chopped
1/2 cup chopped pecans

Preheat oven to 375 degrees.  Grease or line muffin pan.

Mix the flour, baking powder, salt, cinnamon, and sugar in a large bowl.  Add the egg, milk, vanilla, and oil, stirring only enough to dampen the flour (batter should not be smooth).  Add the chopped cherries, apricots, and pecans and mix lightly.  Spoon batter into the muffin pan, filling each cup about two-thirds full.

Bake for about 20 - 25 minutes or until lightly browned.


Something New Saturday: Grilled Honey Mustard Chicken


Today was my second Something New Saturday Cooking Challenge Day.  Today's recipe was from the Six Sister's Stuff Blog.  I absolutely love their blog!  They have so many different and delicious recipes and ideas.  Some seriously inspiring stuff over there.

Anyways, let's get on to the cooking! 

First things first, I had to gather all of the ingredients.  The recipe is pretty simple as it only has 9 ingredients, easy peasy.  It calls for whole grain mustard (I used dijon mustard), honey, lemon juice, garlic, paprika, salt, cayenne pepper, red pepper flakes, and chicken breasts.

In a small bowl, whisk together the whole grain mustard, honey, lemon juice, garlic, paprika, salt, cayenne pepper, and the red pepper flakes.

**Whisk, whisk, whisk**

**Whisk, whisk, whisk**


Reserve about 4 tablespoons of the sauce on the side, and then toss in the chicken breasts, ensuring that they all get smothered in sauce.  Cover the bowl with plastic wrap and let is sit at room temperature for about 30-45 minutes.  (I'm a little iffy on leaving raw chicken out of the fridge for too long, but did it anyways since the recipe said to; so if we all die due to salmonella poisoning, it was this recipe ☺)

Preheat the grill on medium to medium-high heat.  Grill the chicken about 6 to 7 minutes per side or until the chicken temps out at 165 degrees. 

Pour the reserved honey mustard sauce over the chicken and then serve.


I received mix reviews on this recipe.

Ashton's first reaction, was that the chicken was delicious.  He actually really enjoyed the first few bites, but then he said that the chicken was a bit too spicy for him.  Needless to say, he didn't finish his chicken.

Sydney followed her brother's lead.  She really liked the first few bites, and then noticed that the chicken had a bit of a kick and decided to leave it alone.

Personally, I thought the chicken was amazing.  It was nice and moist.  The honey mustard flavor was perfect.  It sort of reminded me of the honey mustard sauce from KFC,  but with more of a spicy kick.

I think this will be one we make again, although in the future, I think maybe I'll forgo the red pepper flakes to see if that cools it off enough for the kids... If it's still too spice then, maybe completely forgo the cayenne pepper too. 

Here's the recipe... just in case y'all want to test it out too!

Grilled Honey Mustard Chicken

1/2 cup of any whole grain mustard
1/2 cup of honey
Juice of 1/2 a lemon
1 garlic clove, smashed and minced
1/2 teaspoon paprika
1/2 teaspoon salt
1/4 teaspoon cayenne pepper
1/4 teaspoon red pepper flakes
4 boneless, skinless chicken breasts

Whisk all ingredients in a small bowl.  Reserve 4 tablespoons of sauce and then pour the remaining honey mustard mixture over the chicken, toss and cover with plastic wrap and let it sit for about 30 -45 minutes at room temperature.  Preheat the grill on medium to medium high heat, grill chicken for about 6 to 7 minutes per side or until chicken is done.  Pour the reserved honey-mustard sauce over chicken and let rest under foil for about 5 minutes.  Serve.


Saturday, July 7, 2012

Something New Saturday: Mexican Chicken Breasts


Recently, I've been toying with the idea of trying a new recipe every week, whether it's a main dish, a side recipe, or even a dessert.  I think this is a great way to try new recipes to mix it up a little in our weekly meals, as well as gives me some new experiences in the kitchen instead of just cooking what I am familiar with.

Today was the first day of my self-imposed cooking challenge.  The recipe I settled on for the week as the newbie was Mexican Chicken Breasts.  This recipe was actually suggested by a reader as a great way to use some of the chicken my family had purchased from Zaycon Foods.  I figured this would be a good starter recipe as it looked pretty simple to make, as well as it's chicken, and my picky children love chicken.  So with no further ado.... let's get started.

Here are the ingredients


The recipe called for one pound of chicken, but you probably could have used more with the same amount of other ingredients.  Other than that, I used a packet of taco seasoning, sour cream, and salsa. 

First, I put both the taco seasoning and the chicken into a bag and closed the top.

**Shake, Shake, Shake**

**Shake, Shake, Shake**

After making sure all the chicken had been coated with some seasoning, I put the chicken into a 13x9 pan.


This went into the oven for 30 minutes at 375 degrees.  When there was about 10 minutes left on the timer, I put some salsa onto the chicken. (I actually only put salsa on two pieces, my kids don't eat spicy food)

After the timer went off, I removed the chicken from the oven, and topped it with a dollop of sour cream on each piece.


After that was the moment of truth:  How did it taste?  Meet my taste testers:
Ashton: 6 years old, loves chicken, hates vegetables and new foods.
This child is probably the pickiest of the bunch.

Sydney:  4 years old, loves chicken, vegetables, and pretty much
whatever is served up.  She is easy to please.
Ashton:  "The chicken is pretty good; it tastes like taco chicken."

Sydney:  "Mmmm, tastes like chicken and flies."

I really wasn't sure what Sydney meant by flies, as I have never served flies for dinner.... she may have been saying rice as she had rice right next to the chicken.

I thought the chicken had a really good flavor.  Just like Ashton said, it tasted like taco chicken.  The salsa added just the right amount of heat and the sour cream added a creamier texture to it.  I'm thinking this one is a keeper and will be added to our menu more often.

So who's up to joining the challenge?  Do you have suggestions for new items we should test out next?  What new foods have you and your family experimented with lately?

Mexican Chicken Breasts
from food.com

1 (1 1/4 oz.) pkg. taco seasoning
1 lb. boneless, skinless chicken breasts
1 cup salsa
1/4 cup sour cream

Place chicken breasts and taco seasonings in a sealable plastic bag; shake to coat well.

Spray casserole dish with Pam; place breasts in casserole dish.

Bake chicken for 30 minutes at 375 degrees.  Top with salsa about 5-10 minutes before breasts are done cooking.

Top with sour cream before serving.