Showing posts with label Cooking. Show all posts

Tuesday, July 26, 2016

Menu Plan Monday 07/25/16 thru 7/31/16


I realize it is Tuesday... Not Monday... so I am a day late.  But in my defense, the past weeks have flown by.  In the past month, I have resigned from a job I worked at for almost nine years, started a brand new job and have worked there for over two weeks now, as well as been attempting to keep up with kiddos and soccer, swim lessons, as well as trying to plan a wedding (my own - for those who may not know - the wedding is next year).  The past several weeks have been a whirlwind of unplanned thrown together last minute meals.

Needless to say, they have been more calorie laden then necessary.  In the past few weeks between the stresses of changing jobs and the meals we've been eating, I've put on a few pounds.  My beautiful sister-in-law suggested that I try e-meals for some of our meal planning.  Her and my brother have been happy with is so far, and they have a variety of meal plans (i.e., kid friendly, low carb, low calorie, clean eating, etc.) to choose from.  There was a two week free trial, so we are giving the low calorie plan a whirl this week.

So here it is - the meal plan for the week:

Monday, July 25, 2016
Beef and Black Bean Taco Salad w/Corn Salsa*


Tuesday, July 26, 2016
Molasses Flank Steak w/Mango Salsa*
Broccoli

Wednesday, July 27, 2016
Packed Lunches/Leftovers

Thursday, July 28, 2016
Pepperoni Pizza Quesadillas*
Salad

Friday, July 29, 2016
Ham & Cheese Hash Brown Waffles*
Scrambled Eggs
Strawberries

Saturday, July 30, 2016
Raspberry Glazed BBQ Chicken Thighs*
Brown Rice
Broccoli

Sunday, July 31, 2016
Leftovers

All of the meals above with asterisks are ones from the e-meals plan.  All of the meals this week (at least the e-meals) are under 450 calories.  I am planning on making a few modifications to some of the meals to fit my families preferences (i.e., no mushrooms or peas in anything) but overall the recipes should be followed pretty closely.  Depending on how my family likes the meals on the menu this week and possibly next, we'll decide whether or not to continue with the e-meals plans after the trial has ended

What's on the menu at your house this week?

Saturday, October 20, 2012

Loaded Potato Soup


One of my favorite things about the fall is the warm comfort food that is now weather appropriate to make (I would make it in the summer if anyone in my family would eat it then). 

A week or so ago (yes, it has taken me that long to get this post written), I made a loaded potato soup.  It was so yummy, and fits perfectly into the comfort food category.  While normally my family is not big soup eaters, everyone that the soup was pretty good except Ashton.  He insisted that he didn't want to try it because he said he doesn't like soup.  He is so stubborn ☺.

The first thing to this soup is to cook up some bacon.  I used probably about 1/2 a pound of bacon in our soup, but you could use more or less depending on your families preference.  I diced the bacon and then fried it until crisp in a stockpot.  Then I sat it aside for later.  Then put the diced onion into the bacon grease and fry it up until the onions are nice and tender.

Once the onions are ready, put the peeled and cubed potatoes into the stockpot along with the chicken stock.  Bring the chicken stock to a boil and cook until the potatoes are nice and tender.

 
While the potatoes are being cooked, dice up the green onions, shred the cheese, and get the heavy cream measured out.  It helps to have everything on hand and ready to go.
 

Once the potatoes are tender, scoop out a few and mush them up.  Set aside.

In a small saucepan, melt the butter and add the flour to make a roux.  Once it is ready, add the heavy cream and mix until it has thickened.  Then add the heavy cream mixture and the mashed potatoes back into the stockpot with the stock and potatoes.

Add the cheese, bacon (leave a little out for garnish), green onions, salt, cayenne pepper and black pepper to the soup.  Stir until combined and cook a few more minutes.

Then scoop into bowls, garnish with cheese, green onions, sour cream, bacon, or any other toppings of your choice and then ENJOY!

 
Loaded Potato Soup
 
1/2 lb. bacon, diced
1 onion, diced
5 large Russet potatoes, peeled and cubed
4 cups chicken stock
3 Tbsp. butter
3 Tbsp. flour
1 1/2 cup heavy cream (use milk if you want to cut calories)
3 green onions, sliced
3/4 cup shredded cheddar cheese, divided
1/2 tsp. black pepper
1 tsp. salt
1/2 tsp. cayenne pepper
sour cream for garnish, optional
 
In a large stock pot, cook diced bacon until crispy.  Remove bacon from pot and set aside.  Cook the diced onion in the bacon grease for about 5 minutes.
 
Add potatoes and chicken stock to the pot.  Bring it to a boil, reduce heat to medium-high, and simmer for about 20 minutes or until the potatoes are tender.  Once they are tender, remove a few scoops of potatoes and place them in a small bowl.  Mash and set aside for later.
 
In a small sauce pan, melt butter.  Stir in the flour and cook until the butter starts to get bubbly looking.  Whisk in the heavy cream (or milk), bring to a boil, and then simmer until it is thickened.  Slowly stir in to the stockpot.  Bring to a boil, reduce heat to low, and simmer.  Add the mashed potatoes back into the pot.
 
Add 1/2 cup shredded cheese, 3/4 of the bacon, and about half the green onions to the pot.  Add the salt, pepper, and cayenne pepper to the pot.  Stir to combine and then cook for about 5 more minutes.
 
Serve soup in bowls garnished with cheese, onions, sour cream, bacon, or any other fixings you enjoy.

Saturday, September 22, 2012

Pumpkin Cupcakes with Salted Caramel Frosting


Happy first day of fall!  Today is the official beginning of one of my favorite seasons (the other being spring). I love the change of seasons, the fall colors, the falling leaves, and the comforting food that gets cooked as the weather starts to turn colder.  In my household, we are celebrating the beginning of fall with cupcakes.  Not just any cupcakes of course though, we are celebrating with Pumpkin Cupcakes with a Salted Caramel Frosting (very fall themed).  So Happy Fall, and enjoy celebrating however you and your family bring in this wonderful season.


Pumpkin Cupcakes and Salted Caramel Frosting
from Made in Melissa's Kitchen

2 cups all-purpose flour
1 tsp. baking soda
1 tsp. baking powder
1 tsp. coarse sea salt
1 tsp. cinnamon
1 tsp. ginger
1/4 tsp. nutmeg
1/4 tsp. allspice
1 cup brown sugar
1 cup white sugar
1 cup (2 sticks) unsalted butter, melted and cooled
4 large eggs, lightly beaten
1 can (15 oz.) pumpkin puree

Preheat the oven to 350 degrees.  Line the cupcake pan with paper liners and set aside.

In the bowl of a stand mixer, fitted with the paddle attachment, combine the brown sugar, white sugar, butter, and eggs.  Beat on medium speed until well combined.  Add in the flour, baking soda, baking powder, salt, cinnamon, ginger, nutmeg, and allspice.  Mix on low until smooth.  Fold in the pumpkin puree.  

Pour the batter into the cupcake liners, filling them about 2/3 full.  Put them in the oven for about 20 - 25 minutes, or until the tops spring back when touched and a cake tester comes out clean when inserted in the center.  Transfer to a wire rack and let them cool completely.


Makes ~ 18 cupcakes.
Salted Caramel Frosting
1/4 cup granulated sugar
2 tablespoons water
1/4 cup heavy cream
1 teaspoon vanilla extract
1 stick salted butter
1 stick unsalted butter
1/2 teaspoon sea salt
2 cups powdered sugar
In a saucepan, stir together granulated sugar and water.  Bring to a boil over medium high heat.  Cook without stirring until mixture turns a deep amber color, about 10 minutes.  Remove from heat and slowly add in cream and vanilla, stirring until very smooth.  Let caramel cool for about 20 minutes, until it is just barely warm and still pourable. Alternatively, you could use just under 1/2 cup of your favorite caramel sauce.  I actually used the one I made the other day.  You can find that recipe here.
In a mixer fitted with paddle attachment, beat butter and salt together until lightened and fluffy.  Reduce speed to low and add powdered sugar.  Mix until thoroughly combined.
 
Scrape down the side of the bowl and add the caramel.  Beat on medium high speed until light and airy, and completely mixed (about 2 minutes).  Mixture should be ready to use without refrigeration.  If your caramel was too hot when added, it will cause your icing to be runny.  If this happens refrigerate for 15-20 minutes. 

Source:  Made in Melissa's Kitchen, 2010.

(Linking this up over at "Or So She Says" Link up Party)

Thursday, September 20, 2012

Salted Caramel Sauce


The first day of fall is only a few days away... and I am pretty excited about it!  In order to celebrate, I am making a really great fall themed recipe.  But before I can make this tasty fall themed recipe, salted caramel sauce is in order.  So here is the recipe for some tasty, almost drinkable (it is that good), salted caramel sauce.  Enjoy.

Salted Caramel Sauce
from Heather's French Press Blog

1 cup of sugar
6 tablespoons of butter
1/2 cup of cream
1/2 tablespoon of fleur de sel (any coarse sea salt will be fine)

In a saucepan over medium-high, heat the sugar.  It will clump together at first, but then will begin to bubble and melt.  It actually looks pretty chunky and icky at first... but it gets better.


Stir often.  When it is melted and golden in color (do not burn), add the butter all at once.  This will hiss a little at you and possible splatter a little so be careful.

When the butter is completely melted, add the cream and stir the mixture well.  Finally, take the mixture off of the heat and add the salt.  Make sure it is mixed in completely, otherwise there will be a lone clump of salt, which really isn't very tasty by itself.

Let the caramel sauce cool some, and then pour into a jar with a tight fitting lid.  Store in the refrigerator.

Source:  Heather's French Press Blog, 2012

(This is being linked up over at Mandatory Mooch's Tasty Thursday)

Wednesday, September 19, 2012

Funeral Potatoes

Yesterday evening, I had the pleasure of being cooked for.  While that really doesn't sound like something that is super amazing, for me, it is.  I am the main cook in my house so when someone else cooks for me, it is AMAZING!

My friend April cooked Funeral Potatoes for the kids and me.  I was a little skeptical at first, I mean they are called Funeral Potatoes... But oh Mylanta!  They are so good.

Not only did I have a second helping, but the kids both had more and Ashton advised that it was a dish we could have again! So, to my dear friend April:  "Thank you for dinner!  It was delicious!"

So, here's the recipe for these fabulous Funeral Potatoes, just in case someone is cooking dinner for you... or you want to make them yourself, trust me, you will not be disappointed!

**This is not the actual Funeral Potatoes we ate (although it looks similar).  We dug into it too fast to actually take a picture**

Funeral Potatoes
from April at Defining Bliss

1 bag of Hash browns
1 brick of cream cheese
1 family size can of cream of chicken soup
8 oz. sour cream
1 bag of cheddar cheese
Toppings:
Crushed cornflakes
1 stick melted butter

Mix together all the ingredients excluding the toppings.  Dump into a 9 x 13 pan.  Top with cornflakes and butter.  Bake in a 350 degree oven for about 30 minutes or until it's hot all the way through.

Then devour.

Now I know these instructions aren't super specific on amounts and what not, but you really don't have to be too specific when whipping this up.  Also, April added bacon to it when she cooked it for us, which was super tasty. (Bacon seriously makes everything better),  She said it also would be really good with chicken.

Also, linking this up to the Mandatory Mooch Tasty Thursday Link Party.  Enjoy.

Thursday, August 23, 2012

Pumpkin Chocolate Chip Cookies


Can you smell the fall in the air?  No?  Truthfully, neither can I.  It has still been in the high 80s low 90s this week and truthfully, it doesn't really look like it's going to break quite yet.  But I am counting down the days until autumn begins.  (Only 30 more days!!!!!)

Fall is one of my favorite seasons.  The leaves falling, the cooler temperatures, and just the feel of the season.  The return of pumpkin spice lattes, jumping in leaf piles, and pretty much everything about the season.  I love it ♥!

In honor of the upcoming autumn season (as well as to hasten the time) I decided we needed some pumpkin chocolate chip cookies in our house.

These delicious cakey cookies will keep me occupied (while only momentarily) and hopefully keep my mind off of the 30 long days left until fall.

Pumpkin Chocolate Chip Cookies
from allrecipes.com

1 cup canned pumpkin
1 cup white sugar
1/2 cup vegetable oil
1 egg
2 cups all-purpose flour
2 tsp. baking powder
2 tsp. ground cinnamon
1/2 tsp. salt
1 tsp. baking soda
1 tsp. milk
1 Tbsp. vanilla extract
2 cups semisweet chocolate chips
1/2 cup chopped walnuts (optional)

Combine pumpkin, sugar, vegetable oil, and egg.  In a separate bowl, stir together flour, baking powder, ground cinnamon, and salt.  Dissolve the baking soda with the milk and stir in.  Add flour mixture to pumpkin mixture and mix well.

Add vanilla, chocolate chips and nuts.

Drop by spoonful on greased cookie cookie sheet and bake at 350 degrees for approx. 10 minutes or until lightly brown and firm.

Then kick back, relax, and enjoy a cookie, or two, or ...


**Linking this up over at the Mandatory Mooch for another Tasty Thursday.  Also linking up over at Six Sister's Stuff Strut Your Stuff Saturday**

Wednesday, August 15, 2012

Perfectly Peachy


I love peaches.  Especially ripe just off the tree peaches.  Those are the best.  About 10 minutes from my house there is a u-pick orchard full of these beautiful, juicy, delectable palmfuls of fleshy goodness.  Unfortunately, once picked, they really don't seem to last long enough.  That of course is where my new love for canning kicks in.

This past week, I've canned about 12 pints of peaches in a light syrup.


I've frozen several pounds of peaches for some nice smoothies or peach cobblers later this year.

I've made some really delicious peach butter.


As well as some jam, of course, was whipped up as well.  Although I love peaches plain, I think my favorite thing that was done with the peaches was the peach butter.  It came out perfectly!  The only change I think I may make the next time around is possibly adding some vanilla bean to it.  It is so good, I could almost eat it out of the jar by itself.

**8/17/12 - I made the peach butter and peach jelly with vanilla bean the other day.... AMAZING! The vanilla adds some real depth to the jelly/butter!**
Here's the recipe for the peach butter, if you want to give it a whirl, trust me, it is worth the effort!

Peach Butter
slightly adapted from The Smitten Kitchen

4 lbs. peaches
1 cup water
2 cups granulated sugar
1/4 cup lemon
1 1/2 Tbs. cinnamon

Cut a small "x" in the bottom of each peach.  Dip each peach into a pot of boiling water for 30 - 60 seconds, and then into a bowl of cold water for a minute.  The peels should slide right off (as long as the peaches are completely ripe).

Halve your peaches and remove the pits, then cut each half into quarters.  Place peach chunks and water in a large bowl and bring to a boil.  Simmer until peaches are tender, about 15 to 20 minutes, stirring occasionally to ensure they cook evenly.  Once cooked, puree in a blender or food processor until it is the consistency you prefer.  (Be super careful on this step, the mixture is very hot!)

Return the peaches to the large pot, add the sugar, cinnamon, and lemon juice and bring to a good simmer/gentle boil, cooking them at this level for 30 to 40 minutes, stirring occasionally in the beginning and more often near the end, as it thickens up and the fruit masses risk scorching on the bottom of the pot.

There are several methods to test for doneness:  You can drizzle a ribbon of sauce across the surface; when that ribbon holds its shape before dissolving into the pot, it is done.  You can also dollop a spoonful onto a cold plate.  If no water forms a ring around it within a few minutes, it is done.  Others use a spoon; if the butter remains rounded on a spoon for two minutes, it is done.  You can also check the pot itself; the butter is usually done when a wooden spoon leaves a clear train when scraped across the bottom.

If you are canning it, follow the normal canning procedures.  The processing time for these is 10 minutes.  Otherwise, let the butter cool and put it in an airtight container in the fridge.  It should be good for at least two weeks.

Makes approx. 4 cups

**Linking this up over with the Mandatory Mooch's Tasty Thursday.  Also over at the Six Sister's Stuff Strut Your Stuff Saturday.  Go ahead and check out some of the delicious things posted over there**

(On a completely non-peach related note, I now have a facebook page, so go ahead, follow me on facebook)

Tuesday, August 7, 2012

Strawberry Blackberry Trifle


Dessert time is my favorite time of the day.  If I could skip every other entree and go straight to the finishing course, I would.  In fact, when I was pregnant with my 6 year old, I used to stash cookies under my bed, you know, just in case there was a cookie shortage.

Lately we have had soaring temperatures.  We've hit 100+ degrees the last few days, and even as I'm writing this (at 9:30 at night), it has only cooled to about 91 degrees.  This heat wave has really put a damper on my baking.  Who wants to turn on the oven when it is so hot outside?  So I had to come up with alternative ways to pacify my sweet tooth.  I turned to good ole' faithful Pinterest for help on this.  I actually found a recipe for an ice cream cake, which may be made later this week if this hot weather persists, but I settled on an adapted version of a strawberry trifle I had tested a few months ago.


This recipe is so simple, and only takes about 10 minutes to make.  It uses angel food cake, strawberries, cool whip, cream cheese, orange juice, blackberry, and sugar. 

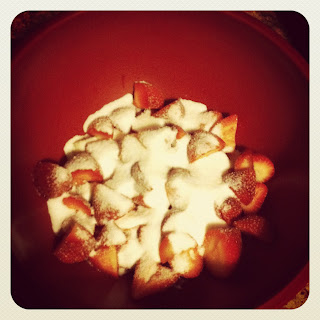
The first step is to slice the strawberries and then mix them with in a bowl with about 1/2 cup of sugar.  This will cause them to start to ooze some syrup.  Set this bowl aside for later.


In your mixer, put the cream cheese, orange juice, and the remaining sugar, mix together until smooth.  Then add 3 cups of cool whip and mix until it is fully incorporated into the mixture.


Cut up the angel food cake into about 1 inch square pieces and set to the side until you are ready to put the trifle all together.  Put about 1 cup of the strawberries into a separate bowl and mush them up.  They will create a nice chunky sauce.  Then it's time to put everything together.

In a trifle bowl, put a layer of angel food cake.  You should use about half of the food cake you cut up.


Drizzle half of the mushed up strawberry chunks over the plain angel food cake.  Then put half of the cream cheese mixture over the angel food cake pieces.  On top of the cream cheese mixture, place the half of the strawberries and as many blackberries as you would like.


Then repeat with the remaining ingredients.


On top of the final layer of fruit, put the remaining 1 cup of cool whip.  Smooth it over the top so all the fruit is covered.  I put heart sprinkles and lemon flavored sprinkles on top, just to add a little pizazz.  I think lemon zest would have been a good substitute for the lemon sprinkles as well though.


Then serve up and enjoy.


Strawberry Blackberry Trifle
adapted from the Giveaway Bandit Blog

1 loaf of angel food cake, cubed into 1" pieces
1 1/2 cups sugar
2-3 pints strawberries, sliced
1 pint blackberries
2 (8 oz.) packages cream cheese
3 Tbs. orange juice
4 cups cool whip
Heart Sprinkles and Lemon Sprinkles (optional)

In a bowl, toss sliced strawberries with 1/2 cup of sugar.  Set aside.

In a mixing bowl, beat cream cheese, orange juice, and remaining sugar until smooth.  Add 3 cups cool whip.  Set aside

In a separate bowl, add 1 cup of the strawberries that are coated in sugar.  Mush these up to drizzle over the angel food cake.  Set aside.

In a trifle dish, place half of the pound cake in the bottom.  Drizzle half of the mushed up strawberries over the angel food cake.  Cover with half of the cream cheese mixture and half of the strawberries and blackberries.  Repeat layers.

Then enjoy immediately, or put in the refrigerator for later.

Monday, July 30, 2012

Homemade Mini Corndogs


Corndogs.  What is not to love about them.  These are probably one of my children's favorite foods (I'm sure that will change by tomorrow).  They like that they are small enough to pick up with their fingers and can be eaten in about 3 bites.  I like that they aren't asking for peanut butter & jelly sandwiches when I make them.  I also love that they are so easy and inexpensive to make.  All you need is cornbread mix (I usually make my own with the recipe off the back of the cornmeal bag) and a pack of hotdogs.


You could probably use a regular muffin pan, but
I prefer the mini one (since the little people in my life can hold them better).
All you have to do is in a greased muffin pan, put a spoonful of cornbread mix.  Then put a small piece of hotdog into the well.  Then cover the hotdog with more cornbread mix.  Easy peasy.


Then put the muffin tins in the oven, and bake until cooked through.


Then remove from the oven and enjoy!  You can always mix it up a bit to by adding honey or other various ingredients to add a little more flavor to the cornbread.

Mini Corndogs

1 box of Cornbread mix (Or one batch of any recipe cornbread you prefer)
1 pack of hotdogs

Preheat oven to 425 degrees.

Mix the cornbread mix according to the recipe or the instructions. 

With cooking spray, grease two mini muffin tins.  Then spoon about 1 teaspoon of cornbread mixture into each well of the muffin tin.

Insert a small piece of hotdog into each well.  My kids like bigger pieces of hotdog, but it really is up to you how much hotdog you want in each corndog.

Once there is a hotdog in each well, cover all the way with the cornbread mixture.  Then bake in a preheated oven for about 15 minutes, or until corndogs are cooked through. 

Remove from the oven and enjoy!

Sunday, July 29, 2012

Three Way Cherries


If you haven't been able to tell, I've been in a canning type mood lately.  I think just with all the fresh fruits and vegetables around, it makes me think of everything we miss out on during the cold winter months. 

Yesterday, a friend of mine brought over an absolutely gigantic bag of fresh Bing cherries.  Her husband found a great deal on them, so he picked them up for us to go on some more jamming adventures.  The first thing we decided to do with these beautiful cherries was to whip out a batch of fresh cherry jelly. I am so glad we did! It turned out so good. Much better than any cherry jelly I've had from the store by far. The recipe we used made 6 (8 oz.) jars of cherry jam, with just enough left over to enjoy over ice cream.  This jam is amazing!


After looking to see how many more cherries there were left, I decided we definitely needed to do something with them to keep them fresh.  I hadn't actually tried canning fruit before, just the jam, so the cherries became my experiment fruit for canning.


Following the normal procedures for canning, I first sterilized the jars.  After that, I stuffed the jars full of the pitted cherries, being careful not to fill them too full (You want the fruit completely submerged in the simple syrup).  I actually added a bit of a vanilla bean to each jar too, to add a slight vanilla bean taste to the cherries.  After that, fill the jars with simple syrup, leaving about 1/4" head space at the top of the jar. 

Then the jars were placed in the canner and boiled for about 15 minutes.  Then the jars were pulled and placed on the counter for 24 hours, to ensure the seal set correctly.


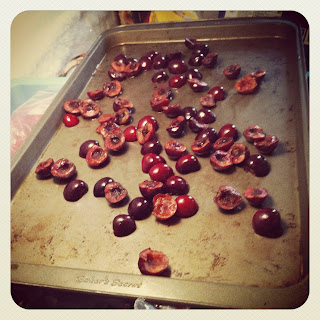
Even after making six jars of jam and six jars of canned cherries, there was a slight surplus of cherries.  With the last bit of cherries, I pitted them, and spread them over a cookie sheet and placed them in the freezer.


Once frozen, these were put into a freezer bag and sealed for later use. 

So there you have it.  Cherries, three different ways, ready for the winter months when cherries are either A) unavailable or B) too expensive to justify the purchase of said cherries.

Cherry Jam

3 cups finely chopped sweet cherries
1/2 cup lemon juice
1 box MCP Pectin
4 1/2 cups sugar
1 teaspoon cinnamon

Measure out sugar into a bowl.  Set aside.

Prepare fruit by pitting and chopping into fine pieces.  Measure out the exact amount needed into a 6 or 8 ounce sauce pot.  Add the lemon, cinnamon, and pectin to the cherries.  Stirring constantly, cook the fruit mixture until it has reached a rolling boil. 

One a rolling boil has been reached, add the sugar and stir until there are not clumps.  Bring mixture back to a rolling boil.  Once it hits a rolling boil again, time it for one minute.

Once the minute has passed, remove mixture from heat and can immediately.


Canned Cherries

2 pounds sweet cherries
4 cups water
1 1/2 cups - 2 cups sugar
vanilla beans

Wash and pit your cherries. 

Combine the water and sugar in a large saucepan.  Stir and bring to a boil to dissolve the sugar.  Keep hot (But not boiling) while you prep your jars.

With clean hands, stuff as many cherries as you can get into each jar.  Fill to about 1/2" from the rim of the jar.  If you want to add vanilla to your cherries, add about a 1 inch piece of whole vanilla bean to the jar a s well.

Fill each jar with the hot syrup, stopping about 1/4" from the rim of the jar.  With a clean, hot, wet cloth, wipe the rims of the jars and place the sealers and lids on top.  Tighten with your hands.

Process in a boiling water bath for 15 minutes.

Remove from the water bath, let cool, and listen for the pops.  To let the full flavor develop, let the jars rest a few weeks before digging in.  Refrigerate any jars that do not seal and enjoy immediately. 


Saturday, July 28, 2012

Something New Saturday: Chicken Pitas


I am a huge fan of food on the go.  Even if I'm not eating on the go, I like a food that uses limited dishes, and I can walk around while eating it. 

The other day while wandering around Yokes, I saw a bag of pita bread.  While I've never actually made anything at home using a pita, I thought to myself, "That pita could be packing some serious deliciousness.  And I could eat it without dishes."  This may sound like a sort of random thought, but I like the idea of being able to not be confined to the limiting constraints of things, like plates and forks.  I want to be free while I eat.  So the idea to make chicken pitas was birthed.

To make these delicious pockets, I basically just cooked some chicken up, threw some seasoning in it.  Then I packed chicken, and other items into the pocket to create a mixture of awesomeness.

My kids, being plain janes, simply had chicken and cheese in their pitas.... boring.

I went a little crazy and mixed black beans, corn, chicken, lettuce, and some cheese.  I even added tapatio and sour cream.  Talk about wild, huh?

Here's the gist of how we made them:

Chicken Pitas

Pitas
Chicken
Assorted Toppings, depending on your tastes (I had cheese, lettuce, corn, black beans, sour cream, and tapatio)
Fajita seasoning

Dice and cook chicken until there is no pink (cooked all the way through).  Then season with fajita seasoning.

Once the chicken is all prepared, heat the pita bread until it is soft and pliable. 

Then stuff to your hearts content with whatever toppings you desire.

Easy Peasy.

What type of toppings do you like to stuff in your pita?

Tuesday, July 24, 2012

"Jam"-ing Out: 3rd Times the Charm


 ♫ ♫ ♫ Oops, I did it again ♫ ♫ ♫

No, I am not singing a Britney Spears song. (Although, as embarrassing as it is to admit, I did belt that song out into my hairbrush back in the day).  I am talking about making jam.  I have really been on a roll lately with this, so when my good friend April brought over fresh blueberries today, we did not hesitate to get going on some more jelly.

Since April's husband Richard picked these juicy little berries off a road side stand, we had to go through and check for stems and leaves.  (Truthfully, we would have gone through them even if they came from the grocery store).  To get this task done, we employed my daughter Sydney.  She was more than happy to oblige.


After going through the berries, we rinsed them off in the sink with a colander.


Then these plump little things did the mash potato (well, not really; they got mashed with a potato masher)


Then, in a large saucepan, the blueberries, lemon juice, pectin, and water were brought to a rolling boil.  We also added about a teaspoon of butter to prevent any foaming incidents.


After the mix was brought to a rolling boil, the sugar was added.  Once the sugar was mixed all the way into the blueberry mash up, it was brought up to a rolling boil again.  Once the mixture hit a rolling boil, the timer was set for one minute.  Once the minute was up, the mixture was taken off the heat.

Then we canned the jam into 8 ounce jars.  The recipe yielded 8 (8 oz.) jars as well as just enough syrup to enjoy a nice scoop of ice cream.


Although I have enjoyed all of the jams we've tested out so far, this recipe is by far my favorite so far.  It has such a good flavor, in my opinion, I almost think it's even better then the store bought blueberry jelly.

Here's the recipe we used in case you'd like to try this one out.  It's actually the recipe from the MCP (pectin) package, but with the addition of the butter and a bit of cinnamon.  So good.

Blueberry Jam

3 3/4 cup crushed blueberries
6 cups sugar
1/4 cup fresh lemon juice
1 cup water
Approx. 1 Tbsp. cinnamon
1 tsp. butter
1 pkg. MCP pectin

Prepare berries.  Crush 1 cup at a time, using a potato masher for best results.  Do not puree, jam is meant to be a little chunky.

In a 6 or 8 quart saucepan, measure in the crushed blueberries, lemon juice, water, cinnamon, butter, and pectin.  Bring this mixture to a full rolling boil on high heat, stirring constantly.

Stir in sugar quickly (it's best to have the sugar measured out in a separate bowl before starting to cook the fruit), then return mixture to a full rolling boil and boil for 1 minute exactly.  Remove from heat.  Skim off any foam with a metal spoon.

Ladle jelly into prepared (sanitized) jars to within 1/4 inch of the top.  Wipe the rim of the jar with a damp towel land place sanitized lid on top,  Screw the band tightly on, then place in canner.  Water in canner should cover the top of the lid by approx. one to two inches.  Bring water to a gentle boil and process jars for 10 minutes.

Remove jars from water canner and set in a place where they will be undisturbed for 24 hours.  Once the jars are cooled, check the seals by pressing the middle of the lid with your finger (If the lid springs back, the jar did not seal correctly and needs to be refrigerated). 

Let stand at room temperature for 24 hours.  Store unopened jams in a cool, dry, dark place for up to a year.  Refrigerated jam can be stored for about a month.

Sunday, July 22, 2012

"Jam"-ing Out Part Deux

So the other day, I had my first canning experience, and I decided that I should not delay the second.  Yesterday I had my first attempt at canning, by myself.  While I had confidence that I remembered all the steps I had been shown the previous day, I still was a bit nervous about the whole process.  But I figure, practice makes perfect.
The recipe I chose to make this time around was for Strawberry Honey Jam. 

There was really not a whole lot to the recipe.  The first step was to cut up all of the fruit.  The recipe called for 6 pounds of strawberries


and 1 1/2 apples grated.


Once those were all prepped, throw the fruit as well as the honey and lemon in to a large pot on the stove for about an hour.  Once the berries start getting soft, mush them with something such as a potato masher. 

After the mixture is the consistency you would like, either can it, or prep it for the freezer, or refrigerate it for 4-6 weeks.

There were a few things that I learned from making this recipe.  First off, adding about a teaspoon of butter to the mixture when you first start to cook it is a must.  I cannot imagine how much it would have foamed while it was cooking if I had not added it.  Second, mixing is a good thing.  I left the kitchen for about twenty minutes while cooking it, and I came back to a little bit of jam burnt to the bottom of the pan.  Luckily, I was able to salvage 4 pints of jam, but sadly, 2 were lost due to my inability to focus on one thing at once.

Other than that, I think the recipe turned out great.  The kids all said it tastes just like the strawberry jam we buy from the store, while on the plus side, I know exactly what's in it (and I can say/spell all the ingredients without a dictionary).


Here's the recipe for the jam I made Saturday as well as the recipe for the apricot pineapple jam from Friday:

Strawberry Honey Jam
from 100 Days of Real Food Blog

  • 6 pounds strawberries and/or blueberries, local/organic recommended
  • 3 ¾ cup honey
  • 1 ½ unpeeled apples, grated
  • 1 ½ tablespoons lemon juice

    1. Make Jam: Rinse the berries and remove any spoiled or severely blemished ones. Hull strawberries and slice in half.
    2. Add the berries, honey, grated apple, and lemon juice to a large pot over high heat. Once the mixture comes to a boil, lower the heat to medium and allow the mixture to continue to boil lightly for approximately 30 – 60 minutes. The berries will burst and thicken so be sure to scrape the sides of the pot and stir as you go. The longer the jam cooks the thicker the final product will be.
    3. Mash the fruit with a potato masher once the fruit begins to soften. If foam forms on top of the fruit you can skim and discard if desired.
    4. Prepare Jars: Meanwhile fill the canning pot ¾ full with water, cover, and bring to a boil over high heat. If you don’t have your jars sterilizing in a hot dishwasher you can use this pot of water to sterilize them. Also start a small pot of boiling water to sterilize the lids separately. Be sure to wash all jar pieces in hot soapy water first.
    5. Once the water is boiling turn off the heat. Test the temperature with your thermometer and when it reaches 180 degrees F put the jars and bands in the large pot and the lids in the small pot. Leave everything in the hot water until ready for use, removing one at a time as needed.
    6. When the jam is done cooking do a taste test to make sure the thickness and flavor is to your liking. Hint from Ashley: Drop dots of jam on a cold refrigerated plate, if it seems to set up, it is done. You can also see if it coats the back of a spoon.
    7. Remove the first jar from the hot water using your jar lifter tool and shake out excess water. Don’t touch inside of the jar in order to keep it sterilized. Insert clean canning funnel and ladle the jam into the jar leaving ¼ inch headspace at the top (this is where the headspace tool can come in handy – leaving more space at the top might not give as good of a seal). If there are any air bubbles you can slide a clean knife along the inside of the jar to remove them. Using a clean rag wipe excess off the outside of the jar and rim.
    8. Using a magnetic lid lifter pull the first lid out of the hot water and set on top of the jar without touching the bottom of it. Then while only touching the outside of the band screw it onto the jar just firmly enough so it doesn’t feel wobbly on the grooves. Repeat until all jars are filled.
    9. Note (If you don’t want to actually “can” the jam): You could stop here and refrigerate jam for 3 – 4 weeks. To freeze the jam make sure you used freezer-safe jars, allow it to cool, and put in freezer for up to one year.
    10. Process the Jars: Bring large pot of water back to a boil. Using your jar lifter (or canning rack) carefully lower as many jars that will fit without overcrowding into the boiling water so they are covered by at least 1 – 2 inches of water. It is recommended that the jars do not directly touch the bottom of the pot (so hot water can flow beneath them) and some even suggest putting a dish towel on the bottom to create space. From the moment the water is boiling and the entire first batch of jars are submerged set the timer and process them for 10 minutes.
    11. When 10 minutes is over use the jar lifter to carefully remove the jars from the water. Put them on the counter and don’t move them right away. You will hear your jar lids “popping” which means they have been sealed properly. If jars aren’t sealed within 12 hours then move them to the fridge and eat within 3 – 4 weeks.
    12. Remove bands from sealed jars and with a clean, wet cloth wipe off any jam that has congealed on the outside rim of the jar. This prevents mold from forming on the band. The band can be reapplied, but don’t screw them on too tightly.
    13. Label jar and store in a cool, dry, dark place for up to 1 year.

    Apricot Pineapple Jam
    (From the MCP insert)

    4 cups apricots, diced into chunks
    1 cup pineapple, diced into chunks
    1/2 cup lemon juice
    1 package pectin (I used MCP brand)
    8 cups sugar

    Put apricots, pineapple, lemon juice, and pectin into a large pot on the stove.  Heat to a rolling boil.  Once the mixture is at a rolling boil, add sugar.  Mix unitl there are no chunks of sugar, then bring back to a rolling boil.  Once there, cook for 2 minutes.

    After cooking the mixture for 2 minutes, fill your jars and process for canning.

    Friday, July 20, 2012

    "Jam"-ing Out

    I have always wanted to make homemade jam or jelly.  I think the whole idea of being able to make your own jelly and can your own fruits is such a neat thing to do.  Very domestic. 

    My bestie April, and her mother in law came over today to teach me just that (Thanks again April for sharing your mother in law with me today), to make homemade jam.   April and her mother in law brought over apricots and plums and we got busy 'jamming' out.

    I was truly surprised at how easy it really was to make and can jam.  The only ingredients we used were sugar, pectin, lemon juice and fruit.


    The first step was to sanitize the jars.  We did this by putting the jars in boiling water.  This santized them and prepped them for the jam.  While the jars were being sanitized, April and I chopped up the apricots and pineapple (the plums were already done).

    The next step was to cook the fruit.  The apricots, pineapple, pectin, and lemon juice all got put into a large pot.  The plums were cooked with pectin in a separate pot.


    This cooked until it came to a rolling boil. Then the sugar was added.


    After the sugar was added, the fruit mixture was brought to a rolling boil.  Then the mixture was ready to be poured into the sanitized jars.


    The jam should be filled up to about 1/4 inch from the top of the jar.  Then the rim of the jar needs to be wiped down (otherwise the jar won't seal right).  Then put the lid and seal on.  This then needs to be put into the large pot of boiling water that was used to sanitize the jars (if you have hard water, then new water should be used to avoid hard water stains on the jars).


    Once the water has bubbles starting to come up from the bottom, set a time for ten minutes.  Once the ten minutes is up, the jars are ready to be removed.  Remove the jars, being careful to not tip them sideways (this can break the seal),   Put the jars in a place where they won't be disturbed for about 24 hours.  This will allow the seal to set up correctly so that the jam is botulism free.

    Then feel free to enjoy the fresh homemade jam however you want.  We started off by drizzling the warm jam over vanilla bean.  So delicious!


    I think I'm going to be on a canning kick here soon.   I've already googled about a dozen different recipes I can make (different types of jam, canning fruits, etc.).   I just cannot wait to get started on them!

    So what about you?  Have you ever tried canning, or making your own homemade jelly?  What recipe's have you tried in regards to canning your own foods?